Casa Cake Mama: Building Our Dream Kitchen with IKEA – Part 1
The time has come my friends to share our kitchen renovation story! It’s been 4 months since we moved into our home in Kelowna and if you follow me on Instagram, you’ll know we jumped right into tearing up the existing kitchen the moment we took possession of the house.
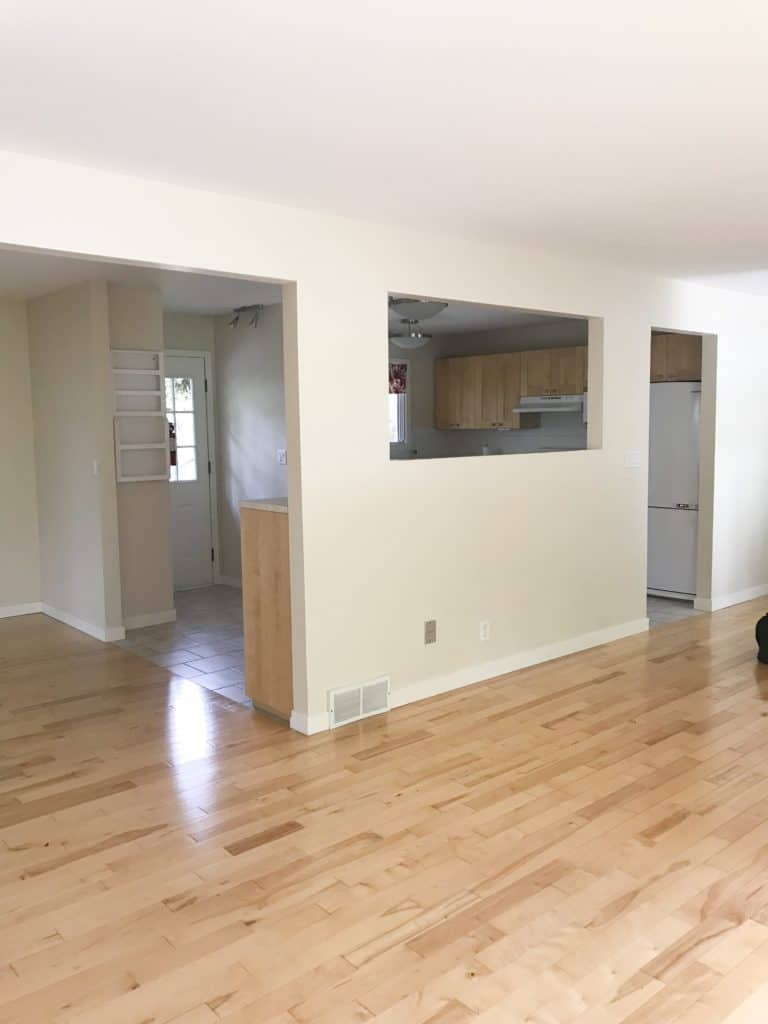
The kitchen had a pony wall with a bar type table that was far too short to be functional and count as counter space and just large square footage with nothing in the middle – truly wasted space. We knew when we looked at the house that the wall would have to go as well as the closet pantry.
We also knew we loved the idea of a really big island where we could prep and store all of our dry goods instead of a traditional pantry closet and after seeing beyond what was physically in this house (which can be sooo hard to do in the moment!) we were up for the challenge of DIY renovating our kitchen!
When it came to finalizing where we would order our new cabinetry from, IKEA was at the top of our list. We did review a couple of other options such as custom cabinetry and cabinets from our local hardware store, however, what it really boiled down to was quality, style, turnaround time and cost. IKEA was our best option and seeing as how we’re unofficial experts on assembling IKEA furniture (aren’t we all LOL!), we were prepared to take on the challenge.
In this 3 part blog series, I’m going to take you along our journey of building our dream kitchen with IKEA. Today’s post is going to talk about the process of building and ordering your kitchen and how relatively easy it was for us to get things going before we even moved into our home!
Building your dream kitchen.

IKEA has a very user friendly website that allows you to build your kitchen right from your living room, bedroom or just about anywhere you can bring a laptop to! Before you get started you’ll want to make sure you measure out the dimensions of your kitchen including floor space, window sizes and doors and be sure to measure them TWICE! There’s nothing worse than realizing after you’ve completely assembled cabinets that they don’t fit *face palm* but rest assured that even if this does happen, IKEA’s 365 day return policy makes it easy to get the right parts you need, but lets do it right the first time! 😉


Once you have all of the numbers, you can literally build the kitchen space on the IKEA website. Since we weren’t doing major reconstructive renovations, it was easy for us to plug certain things like where a fridge, stove and sink were going to go because we were keeping those things exactly where they were. With the kitchen builder program, you can insert these appliances in place so you know how much room you have left and what size of cabinet will fit there.
A few of the things we did change was the cabinetry above the stove. I wanted a grander look to the kitchen and felt that a standalone hood fan would make a statement so we purchased ours from IKEA. The other change was adding our beautiful 8ft island. The kitchen builder program neatly categorizes all of the cabinet styles (wall, base, island) so I was able to go through the template one section at a time and drag and drop the size of cabinets I wanted.
One other hot tip about using the IKEA kitchen builder program is to SAVE, SAVE, SAVE your work! Tweaking and building a kitchen requires some time and thought and to find out that your changes didn’t save is very heartbreaking, LOL, speaking from experience here!
Finalizing your kitchen.
Once you’re happy with the design of your kitchen, you will need to visit your local IKEA to meet with a kitchen expert to finalize your design, as there are extra parts that will need to be added on to your order that you don’t have access to on the website and it all gets double checked by another kitchen expert to make sure you walk away with the exact kitchen you ordered!


If you haven’t chosen things like cabinet fronts, handles or counter top options, you can browse the beautifully organized kitchen displays while you wait for your turn to meet with an expert.


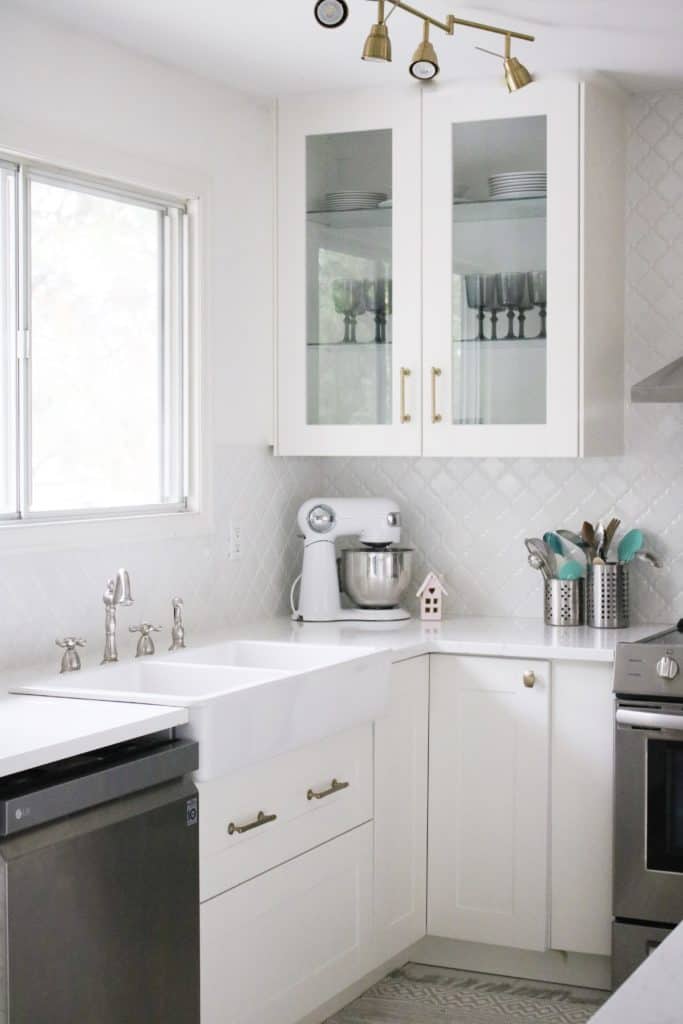
We chose the GRIMSLÖV cabinet fronts which is a very sleek shaker style. We felt that this was the most timeless style that suited the look we were going for and decided to hold off on handles and counters for the time being.
When we met with our kitchen expert, I logged into my IKEA account and she reviewed my kitchen layout. It was neat to meet with her because she gave us some ideas I wouldn’t have otherwise thought of, like changing up one of the wall cabinets into a double door glass cabinet front to add some visual interest to the kitchen. LOVED this idea! She also helped us with finishing pieces, toe kicks, and filler pieces- as your kitchen layout may not necessarily fit the available cabinet sizes and leave you with small gaps that need to be covered up.
When you’re happy with your final design, your layout will be reviewed by another kitchen expert and then your order is processed! Congratulations! You now have a kitchen!!
Hot tip when ordering your kitchen- did you know kitchen furniture such as bar stools, tables and chairs count towards your discount? We wouldn’t have known that without asking our kitchen expert, so be sure to include those in your order!
The Before and After
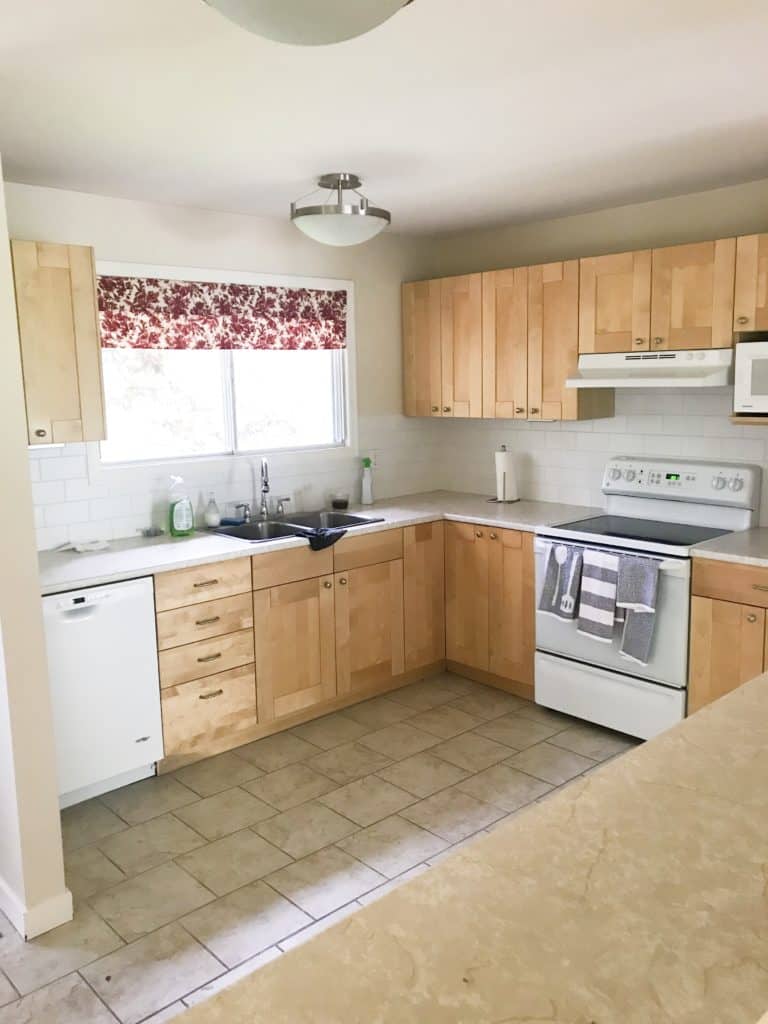
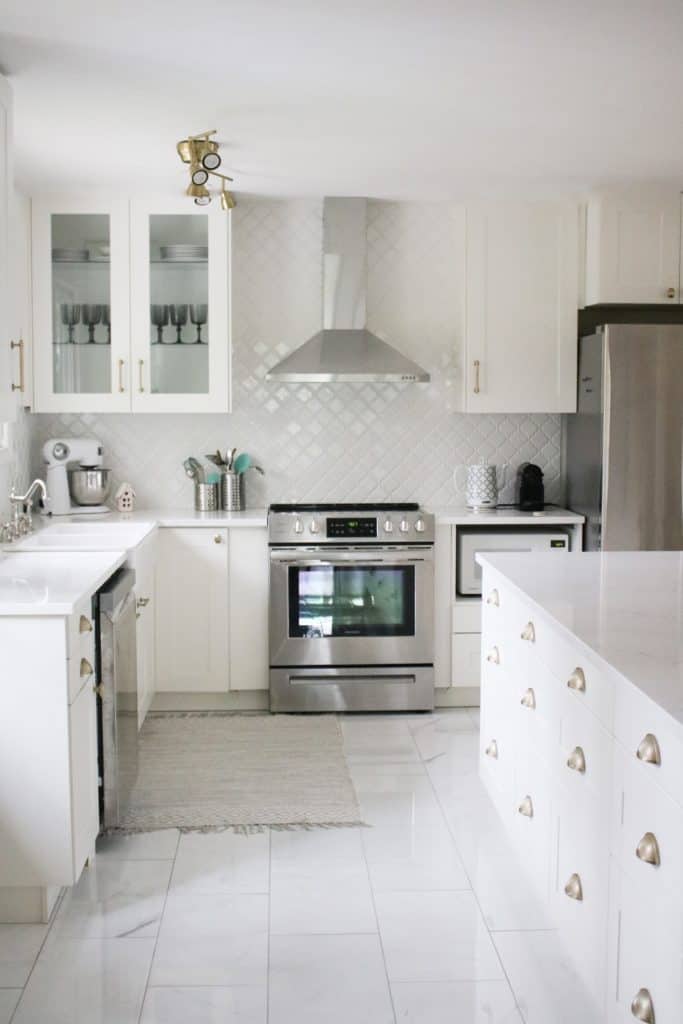
Without further ado, here is what our kitchen looked like before, and how it looks now! Honestly, I didn’t think we could ever pull off a kitchen that looks like this by ourselves but here we are and we couldn’t have done it without IKEA!


IKEA Kitchen Event
We were fortunate to have planned our kitchen order around IKEA’s kitchen event which gave us some savings towards purchasing other items we needed around the house. The event occurs a few times a year so be sure to keep your eyes peeled for it! You can read all of the details here!
Click here for part 2 where we talk about receiving our IKEA kitchen delivery and our assembly process!
This post is sponsored by IKEA Canada, all opinions and reviews are my own.
